Sunday, 28 February 2016

A Full Moon...

So we have already gone over what a monster is and we looked into the vampire legend. Today I thought we could look into another well known create known as Lycanthrope or more commonly thought of as a Werewolf!! These particular beings are thought to be able to change in to a wolf or a wolf like creature either purposefully or by accident such as a bite or scratch from another werewolf. The folklore behind the werewolf came about around the same time as the witch trials were happening. It started off in what is now known as Switzerland and eventually spread across Europe. Soon the persecution of Werewolves was an incredibly common thing just like the witch hunts.

In the old European folklore there were many different characteristics that were thought to be able to distinguish a werewolf to normal human being. These included both eyebrows meeting in the middle, curved nails, low set ears and a swinging stride. However in wolf form there were very few differences from a normal wolf. One main one though is the fact that a werewolf will have no tail. This is thought to link to witches for when they are in their own animal form.

There are thought to be a few different ways on how a werewolf turns. The most common is one is on a full moon. This came about from French and German folklore, it was thought that if a man or woman was to sleep outside on certain Wednesdays and Fridays on a summer night with the full moon shining on their face that they would be able to turn. One of the more simpler way was to strip of clothing and wear a wolfskin belt. Another was to drink rain water from the footprint of that animal was said work. Remedies to help get rid of a werewolf include the medicinal use of wolfsbane, exorcisim or some slightly more painful methods. 

Since the 1900's Werewolves have become more popular in modern fiction writing. It was actually in 1935 that it was thought that silver would be able to harm a werewolf. It is also said in Bram Stoker's 'Dracula' that a werewolf can only be harmed a 'sacred bullet' and they can only change forms during the night and not day. Also thanks to modern fiction it is thought that werewolves have heightened senses such as speed and strength. Each film or book depicts werewolves to look slightly different. For instance in 'Werewolf in London' the main character is said to keep most of his main features, while in Stephanie Myers 'Twilight' Jacob Black turns into a slightly larger version of a normal wolf. Another version is in J.K.Rowling's 'Harry Potter' series, Professor Lupin turns into a wolf form but walks on his two hind legs but has none of his normal features.

There is a medical condition called Clinical Lycanthropy. This is a rare psychiatric condition where the person thinks they can transform/ have transformed into an animal. 


Thursday, 18 February 2016

Hair practice

Today in Helens lesson we were able to start practising what we are planning on doing for our final design. I didn't have a proper idea for what I wanted to do but I new I wanted some form of curls involved. I started of by putting the front parts of the hair in rollers like I did last week. I then tied the top half of the hair into a ponytail and started curling. Once fully curled I started pinning pieces of hair in random places on top of the head. It was at this point that Helen came over to give a little bit of feedback and advice. She told me that curling the hair means that it is going to be rather hard to keep up continuity as they can be different every time. She also said that it takes a lot of time curling and to maybe try plaiting the bottom part of the hair and twisting it up into the top section to help minimize time. I thought that this would be a really good idea however I also wanted to see how well curling the whole hair would be. I was able to curl most of the hair quite quickly however I would still need to be a little quicker than I was. The overall look turned out a lot better than I expected however I think trying to replicate this particular style will end up being really hard as I wasn't really looking where I was pinning. If I was going to do this style I would have to count how many curls I did so I could do the same amount next time. I would also have to photograph where I pinned each piece so I could do it the next time.


Throwing punches!

Not only were we creating fevers we were also causing a few black eyes. This was a quick last minute thing but when it comes to creating your bruise you need to think about how old it is. The fresh bruises are slightly more blue and purple where the old bruises are a green/ yellow colour. The bruise that I created in the continuity lesson was just hope for the best kind of thing as I wasn't really sure what I was doing. It came out as though it was slightly more in middle stage as it had that yellowing tone.

  1. The first thing that you want to do is is place a bit of moisturiser on the back of your hand along with the colour you want to start off with. 
  2. Gently pull up the eye so that there are no creases when you are adding the colour. For the colouring you can use supracolour or a bruise wheel.
  3. To add the colour you can either use a baby bud or your finger. Make sure all the colours are blended and try to create a sort of mottled look. If you are planning on using a brush don't swipe the colour on, dab it.
  4. Lastly add a small amount of vaseline to help create that 'shiner' look.

Like the rash the feedback that I got was to add more colour. I've found that I am incredibly wary that it looks too theatrical and I end up using less than I should. I need to start building up colour and to stop worrying as much.

Disease ridden!!

So in today's lesson we were giving people fevers! This is probably one of the more realistic things that we've done so although certain aspects were easier it was still slightly difficult to do. If you are going to give your character a disease of some sort you will need to look up the symptoms to help keep it realistic. 
One of the new products that we will be using today is Glycerin. This can be used to create sweat and tears. If you are planning on using for tears do not put in the eye but just under it. Tears come from the inside of the eye so place just below the dear duct rather than on the outside of the eye. Another way to create tears is to go to a chemist and buy individual strips of eye dropsand use these. They don't harm your eyes and they create more of a watery affect.

When it comes to creating a rash it may be easier to do on natural skin as it looks slightly more real. If you do choose to do this make sure you cover any spots or blemishes as they can ruin continuity. If you want to try and create dry lips you can either use latex or eye lash glue.

The things that you will need for this are:

  • Kryolan Supracolour
  • Stipple sponge
  • Glycerin
  • Latex
  • Old set of brushes
  • Moisturiser
  1. So the first thing you do is place moisturiser on the models face and a small amount on the back of your hand.
  2. I then placed a small amount of red Supracolour on the back of my hand and mixed it with a small amount of moisturiser. Using the black stipple sponge dab lightly on the skin around the cheeks and nose. Using your fingers gently blend it out so that it looks a little more blotchy.
  3. Slowly start to build up the colour but be careful as you don't want to make it look to theatrical. This is where I struggled as in the end I actually didn't put enough colour.
  4. Use a fine pointy brush around the eyes starting from the inner corner. Make sure you get right down to the lashes. If you want to get red on the waterline think about getting the kryolan red eyeliner.
  5. Using a paint brush or one from your old set flick paint onto the face to help create blotches.
  6. To create the dry lip get your model to screw up their lips and dab on latex. You can use a baby bud to get to the inside parts of the lip. Once the latex dried you can start to add colour and maybe a bit of blood for a split lip?
  7. Now for the glycerin. Using the black stipple sponge dab around the areas where sweating may occur so the forehead, the upper lip and the cheek. You could lightly damped the hair to help add the affect of sweating. 
  8. Using the eye drops get the model to tilt their head right back and place in the inner corner of the eye. You would do this right before the shoot so that the tears aren't already down the face and so that they don't dry out. 

Overall I found this task slightly easier than the others, however the feedback that I got was that I could have added more colour. I was cautious when it came to adding the colour as I didn't want to go over board.

Continuity?

When it comes to things like creating characters, you need to think about the characters background, status, characteristics, personality, state of mind, apparition and attributes. All of this is what makes a character who they are as a person. You have to treat them like real people because if not it's harder for the audience to get as involved and interested in the movie as they can't really relate to them.

The responsibility of continuity on set is down to the script supervisor however it is up to the make up, hair and props people to actually keep the continuity going. The character must have the same clothes, jewellery, hair style, make up and props at the start of every new scene as they did in the previous one. Without continuity it makes the film look a little stupid as it ruins the illusion that the film is meant to be real life. Careful notes and lots of photos have to be taken before and after the shot so that you can keep up with continuity.

We were given a task to show us how difficult continuity can be. We were to create a black eye on our partner, take photos, get them to remove it and do it again the exact same! Now it may sound easy but trying to do things like keeping the colouring and placement of the bruise was a lot harder than I thought it would be!! 


The one on the left was my first attempt and the one on the right was my second. As you can see they are slightly different colours as the left one has a slightly bluer tint while the right one looks slightly redder. However I think I did an okay job as the differences aren't really that noticeable. At least I don't think they are!

Tuesday, 16 February 2016

Late Victorian Hair

This week we are learning about the later hairstyles in the Victorian era. So unlike the earlier styles, the later ones were obviously slightly different. Rather than having their hair shorter and framed round the face, it was scraped back at the sides and big on top. Because of this the the styles of hat changed to fit around the hair. Although plaits and buns were still used, there were a lot more curls used and they were a lot longer and a lot looser. Along with hats, many other hair decorations were used such as flowers, pieces of fabric or Alice bands.  In the earlier styles we saw that the parting of the hair was down the middle. This stayed more or less the same but the start of fringes came about, and they aren't what you think they would be. The fringes were incredibly short and had tight ringlets. The hair styles changed mainly due to practicality. For instance between 1861-65 was the Americal Civil War. Girls changed their so that they could keep it out their face. Wig pieces were also used if a persons hair was slightly thin or they wanted to do an elaborate up do but wanted some hair down.

So for the practical side of the lesson we were using rollers and curlers. It was a pretty simple thing to do but it actually takes a lot longer than you think it does.


  1. The first thing that you do is to create a middle parting.
  2. Then create a rectangular section on top of the head facing downwards. Make sure that both sides are equal sides from the head so that neither side goes baggy. Then place a roller in and pin it down. Do this twice going down on both sides and then 2 going sideways.
  3. The next step is up to you on how you want to design your hairstyle. What we did was to tie up some of the remaining hair into 2 ponytails and the curl them. You can also curl the parts of the hair that aren't tied up. Once you have curled the sections that you want you then pin them up so that it creates an almost waterfall affect. 
  4. The last step is to take out the rollers. Take out the ones at the side and then pin them in the middle at the back of the head. Do this on both sides.
  5. Lastly take out the ones on the top. Brush them out and pin them slightly higher than the ones on the side. This creates the middle parting we were talking about.

There's no such thing as monsters!

There are a few different definitions for monster:
  • A large, ugly and frightening imaginary creature. 
  • An inhumanly cruel or wicked person
  • A thing of extraordinary or daunting size
  • A congenitally malformed mutant animal or plant. 
The word monster originated from the Latin word monere meaning warn. It then slightly changed to monstrum meaning portent or monster. The last change was it becoming the word we know today. 

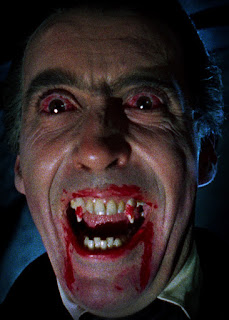
The monster that I am looking at today is the Vampire!! A Vampire is a mythical being that is said to live of the life of human beings. There have been many adaptations of what a vampire might look like from Stephanie Myers sparkly Edward to Bram Stoker's scary Dracula. Vampires were originally thought to have been bloated and dark skinned however in the 19th century that image was changed rather drastically to the pale and gaunt looking vampires we think of today. Vampires are a widely known legend and in the 18th century many stories including these foul creatures led to actual human corpses to be staked. 

The start of the vampire phase is all down to one man. John Polidori wrote a book called 'The Vampyre' which was one of the best selling books of the 18th century. However it is Bram Stoker's Dracula that people automatically think of when the word vampire is said and it is probably the basis of the modern vampire style and legend.

There are many myths around that surround the Vampire such as that they have no reflection and don't cast a shadow (this could be because they lack a soul). Another thing is that garlic is said to harm vampires along with things like a rosary, holy water or a crucifix. It is also said that a vampire can't walk on consecrated ground such as a church or temple. They also can't cross running water. It is also thought that they sleep in a coffin and come alive at night. Lastly they can't enter a home without permission, but after the first invitation they can come and go as they please. Legend says if you're trying to kill a vampire you gotta have quite a bit of strength in you as a stake to the heart or decapitation are the more popular ways, and they don't sound easy

Now how did the vampire legend come about? Back in medieval times many people were buried alive due to the lack of medical knowledge. This caused people to scratch at the coffin causing fingernail marks making people believe the person had come alive. In the worst case the person may bang their head and face against the coffin door causing blood to come the face making it look as though they had been 'feeding'.  And an easy explanation for the noise coming from the coffins is the natural gas being released from a decomposing body. Sounds lovely eh......


Early Victorian Hair

So unfortunately I wasn't able to be in for this lesson due to personal reasons however I was able to pick up a few things from my course mates and after looking at their styles I was able to get an idea as to what I could do at home.

From what I have gathered, women in the early Victorian era kept their hair quite short and around the face. This is partially due to the fashion of bonnets. Many women wore this type of hat and so as not to ruin their hair they designed it so that framed the face rather than being placed on top. Buns and Plaits were still used however I don't think they were done as elaborately.

  1. The first step that I did was to create a middle parting.
  2. I then separated the hair from the top of the ear to the top of the head. I did this on both sides and clipped them out of the way.
  3. The next thing that I did was to tie the last bit of hair into a ponytail and create a bun. I tried twisting the hair and pinning it, however by the time I had pinned it all in, it didn't look very twisted...
  4. I think took out the front two sections and created plaits and then pinning the ends into the bun. I didn't want to plaits to be tight and right against the head. I wanted a slight loop in the hair.
Overall this wasn't the hardest look to do however due to the katie head having rather short hair I feel as though the style didn't come out quite right. For instance I would have liked the plaits to have a bit more of a dip to them. 

Fire Exit?

So today in Sue's lesson we learnt how to create a burn which meant looking at a few gory pictures to get an idea. The first image we saw was a 1st degree burn which is something like a sunburn. There isn't a whole lot of colour but the small amount that there is a very thin layer. When it comes to create our own burn means we would need to blend out the colour so finely that you can still see the skin behind the colour. 2nd degree burns are slightly worse and they eat through the skin. Things like acid can cause a 2nd degree burns. Again they have no hard edges however the colour is a lot more prominent. To help create the blended out edges you can use a brush and dab on the colour (stippling) rather than swiping on the colour. If that made an sense!! When creating the burn you have to think about what type of burn you are creating. 

The main thing that we will be using is Gelatine. This substance is simply fabulous however if you are a vegetarian/ vegan there are other options that you can use if you aren't comfortable with using it. Once melted down you can add colour to it if you want. You can only remelt it once because the more you do it the more it dries out. Once it cools you can place it straight onto the skin and when your done you can just peel it off! If your planning on doing things multiple times you can use a mould to keep it the same. All you need to do it put release spray or a bit of vaseline in the mould and then add the gelatine, once dry gently peel it off. If you are going to put it on the face you would place it on first and then add any makeup over it. Like the wax you can use a cool hair dryer to dry it as heat will melt it. Once dry pat some translucent powder over it and start to build up colour. You can use gelatine for things like cuts as well not just burns. You can buy gelatine from places like Neal's Materials or Charles Fox. A slightly cheaper way as well is using store bought jelly!


  1. The first thing that I did to create my burn was to cut off the amount I need and place it in the microwave for about 20 seconds. However the timing will depend on the amount that you are using. The gelatine will be hot so give it a stir to help it cool down. 
  2. Before placing it on your model, place a small amount of your own hand just to test the temperature. If it's too hot obviously wait a little longer but if not place on the model and double check with them that it's okay.
  3. Layer onto the skin making sure that there are no hard edges. I found this part particularly difficult as I found that I couldn't move the gelatine around as easily as I thought as it dries rather quickly.
  4. When it is drying you can create texture by dabbing it with the spatula this helps create a scarred look.
  5. Using the hair dryer just cool it down slightly. You can't really tell when it's dry as it will always feel slightly tacky.
  6. Using witch hazel you can thin out any edges that can be seen. This was another struggle as I ended up lifting some of the gelatine from the skin and I wasn't able to stick it back down. Now this can be good if you wanted to create flaps of skin but I didn't. This meant I had to reheat the gelatine and re stick it down.
  7. Use an old powder puff dab on the translucent powder to take away the tackiness. This also helps the gelatine look slightly more skin like. 
  8. Using brushes or a black stipple sponge, stipple on a thin layer of colour. You can use moisturiser to help thin out the colour. Using a pin you can create holes in the gelatine but again you have to be careful that you don't peel it away from the skin. Using fine brushes add a little depth to make it look more real.
  9. The last thing that you can do is add a little bit of wound filler or dab some blood on it. 
Overall I think that my version turned out okay. It's not the best thing in the world as I couldn't get the colouring just right. I feel like it looks more like a cut than a burn!! I just need a bit more practice I think! 

Wednesday, 10 February 2016

Dracula part II

So I have finally finished Dracula meaning I've got a slightly better understanding to my character. So after writing my last post, Lucy had been killed with the next few pages of the book. Unfortunately Lucy had her head chopped off and a stake through her heart. Little gory but hey ho. This has given me a few ideas as to what I could do for my character design.

To help give a few more ideas, I decided to watch Bram Stoker's Dracula made in 1992. Now at first I was really enjoying the film however mid way through it started to go in the complete opposite direction from the book. I felt that this didn't portray the greatness of the book and it ended up just being a little too strange. However I was able to get a version of what Lucy Westenra was portrayed as. Instead of having blonde hair, this version had a slight ginger tone to it. The curls were there and the angelic look could be seen. During Lucy's time alive the film portrayed her as quite the seductress, with daring dresses and a confident attitude. Lucy had naturally pale skin accentuated by the pale pink cheeks and the slightly framed eyes. There is one scene where her lips were painted to match her cheeks. As her 'illness' goes on her skin becomes a slight grey/ blue colour and her cheeks and eyes become hollow. The small puncture wounds on her neck are barely visible as they blend in with the skin but there was a small amount of blood to help them stand out a little bit. Once poor Lucy had fully transformed her skin had gone completely white, meaning the paleness of her cheeks stood out. She had a small bit of blood on her lips and running down her chin. Let me say, she was a sight to behold.

Due to her head being but off I was thinking about maybe trying to do some sort of cut along my models neck. I definitely want to have some sort of blood around the lips as I think that it really makes a statement. Pale skin and rosy cheeks are an obvious but I need to do it in a way so that it fits in with the time period. When it comes to the hair I'm not so sure as to what I am going to do. I want there to be curls but I can't figure out whether the hair should be up or down or both!!


Ouch!!!

Today was another practical which caused us to end up with a few cuts and bruises! Not real ones though of course. I really enjoyed doing this style of work however it was a lot harder than I thought it was!! So before we start I'll give you the list of things that will be needed before you get going:

  • Moulding Wax
  • Latex/ Sealer if allergic to latex
  • Hair dryer
  • Collodium 
  • Acetone
  • Supracolour Pallet
  • Wound Filler
  • Cuts and Bruise Wheel
  • Moisturiser
  • Blood
  • Rounded Metal Spatula
  • An old set of brushes
  • Black Stipple Sponge.
As you can see there are quite a few things that are needed, although not everything is directly needed for a cut. For instance Collodium can be used to create scars and actually isn't needed for a cut, but I thought it kinda relates so I added it in just in case. If you do want to create a scar, put barrier foam on first then place the collodium on the skin and lightly pinch it together. Once dried it will create a scarred look. You will need to use spirit gum to get it off.

So a few little points before I explain the steps. Moulding wax can be used on the face but like usual just be careful around the eye area. Double check with the model if they are allergic to anything so that you use the correct products and don't cause any harm. You will need to think about things such as what kind of cut so they have? Is it a knife wound, have they fallen and simply grazed themselves? You also need to think about what type of ground they have fallen on. Is there dirt? Did they land on glass? 


  • So the first step is to get some of the moulding wax and using the spatula warm it up on the back of your hand.
  • Place a small amount on the area where the cut will go. For me that was on the inside of the arm. Make sure that there aren't any hard edges so blend it out as much as you can. You are able to layer up the wax to create more of a shape. You want to make it look real and not over the top so really think about how the cut came about. Using the spatula make a line down the middle so that it looks like a cut.
  • Once you have created the cut, cover it in a thin layer of latex or sealer and using the cool setting on the hair dryer wait until the latex has gone clear. Using the acetone make sure that there aren't hard edges. If you use the hot setting on the hair dryer it may melt that wax, which is something you don't to happen.
  • The next step is to start building up the colour using your Supracolour pallet. Using the old brushes you can flick on the paint to create a mottled look. You want to be careful that you don't go crazy with the colour and make it look fake. You want to do it so that you can still 'see the skin' under the colour. 
  • Lasty using either a hair pin or brush get a small amount of wound filler and place it in the middle. Add a small amount of blood to help it look a little more real. One thing this is that you've got to think about the colour of the blood depending where the cut is and how old it is. Also you would need to add the blood after they have fallen as if you do it beforehand the blood will run down the arm and it will look a little odd once they are on the ground. Lastly if you want to create a graze just lightly brush the black stipple sponge along the skin.